Before we purchased our house, we would talk and dream about what we would like in our new home. Now, of course, nothing is perfect and the house we ended up purchasing didn’t have everything we wanted. Ya’ know, the whole budget thing. It was up to us to make it our dream home. So, we did the most natural thing and started browsing and pinning on Pinterest. Eventually, we created a board and from that board was born a list of things we would like to have. Among that list, the half bath remodel.
Disclosure: This post may contain affiliate links, which means we may be compensated at no cost to you if you make a purchase.
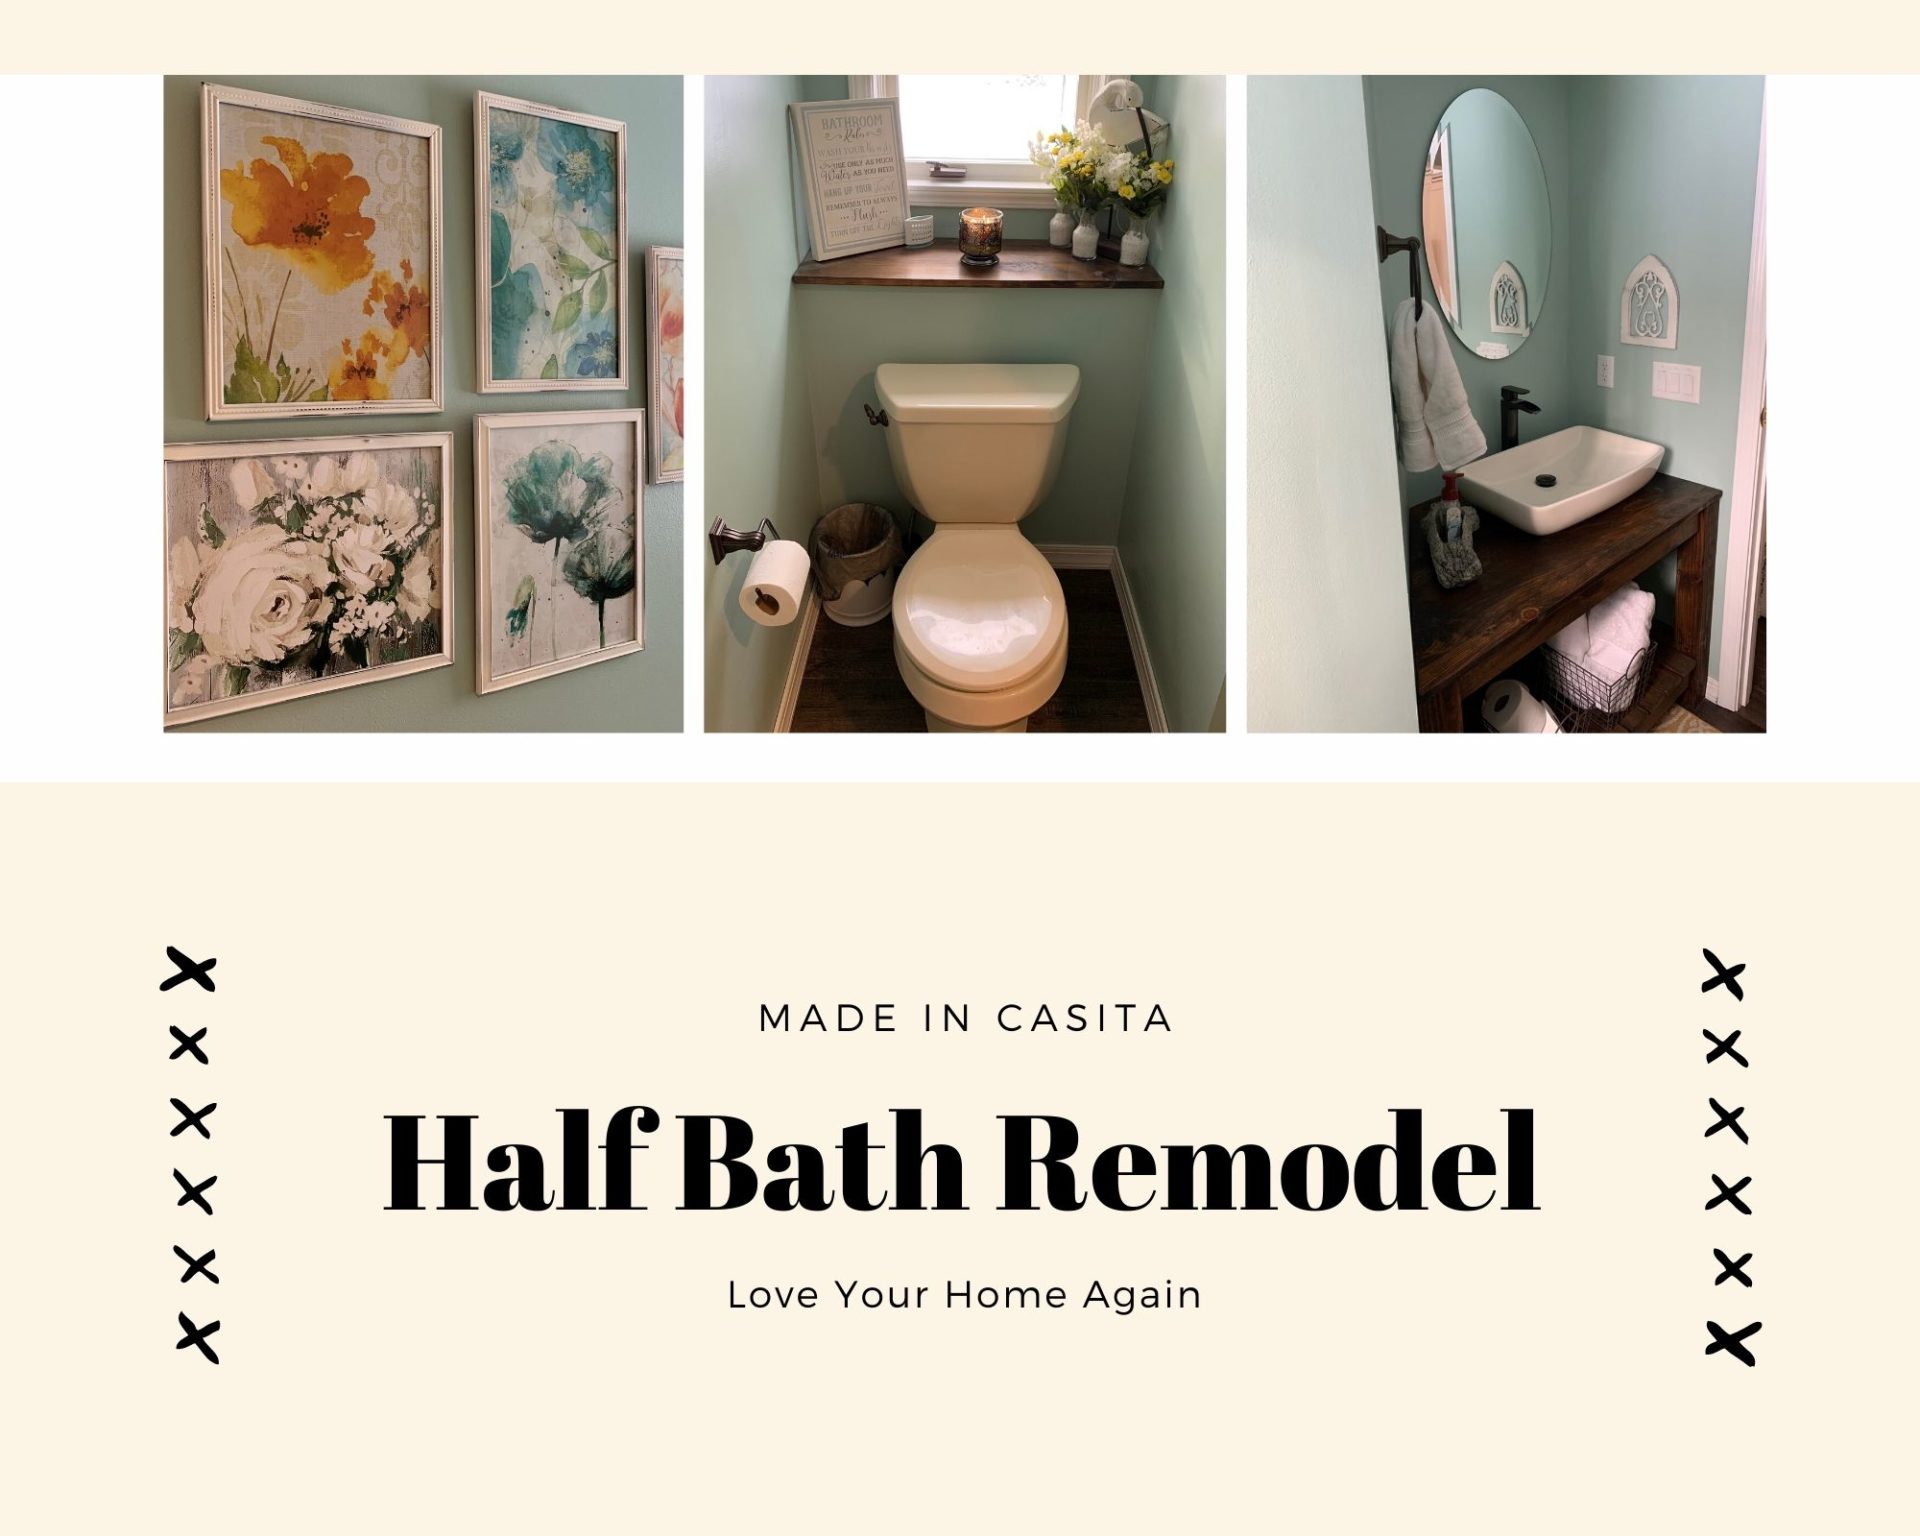
I liked absolutely nothing about this powder room. It was small, dark and dingy. It had this ugly brownish tile for a vanity countertop and wall. It made it feel like a cave, not to mention it was hard to clean. The vanity, (oh God the vanity), well just look for yourself and decide if I’m exaggerating. It just wasn’t my taste at all! (Puke in mouth just a little).


After much debating and deciding to do the floors, we decided to tackle these projects back to back.
Materials
- General:
- Valspar Seasprite paint
- Sink and Faucet
- Minwax stain Dark Walnut
- Rust-Oleum spray paint
- For the vanity:
- 1in x 12in x 8ft solid pine board (for the countertops)
- 4in x 4in Douglas Fir posts (for the legs)
- 2in x 4in x 8ft solid pine board (for the frame)
- 1in x 3in x 8ft solid pine board (for the bottom shelf)
Get those work gloves on!
Disclaimer: Before attempting any project make sure you do your research and know what your doing, always implement safety guidelines. We want you to be safe!
Step 1
First, we took everything out including the toilet since we were replacing the floors as well. We took apart the *cough* ugly vanity and removed the not so fabulous tile.


As you can see there were some damages made to the drywall because of the cursed tile, but that was quickly resolved by cutting and replacing those areas with new drywall.
Step 2
After all the demo, we proceeded to paint the walls. We chose a soft teal, called Sea Sprite by Valspar (that decision took us a long time to agree upon, but I’ll leave that story for another time). We also spray painted most of the plumbing with satin black Rust-Oleum spray paint as you can see in the pictures in step 3.


Step 3
Next was onto the floors. Before laying the floors and installing the baseboard, on account that my husband was custom building the new vanity, we prebuilt the frame before laying the floors just to see how it would fit (this vanity was built in different sections; frame, countertop and the bottom shelf). With tapping block in hand and knees on the ground, we assumed the position and went to town, installing the new floors and nailing the baseboard trim (for more details check out our floor post).


Step 4
Under the window, there was, guess what?… even more tile. There we used a 1in inch pine board, stained it and also used Miniwax Helmsman clear varnish for waterproofing (we used this same technique for the vanity as well) before finally placing it on the window ledge. Now all that’s left was to assemble the vanity and install the sink and faucet (which we bought on amazon).


Final Touches!
Now for what I say is the fun part! After all that hard work, the half bath remodel is done and its time for accessories and some decorative items to finish the space.


Time for some wine as I appreciate how beautiful this bathroom turned out! Now it’s actually our taste and we are one step closer to our dream home! What about you? What are some projects on your to-do list? If you enjoyed this story please share and comment below!
Get the look!


The rest of the decor pieces like the vases, flowers, rocks and wall art you can find at Dollar Tree. As for the white stork and sign, those were found at Hobby Lobby.