Today we are bringing you a super easy DIY custom vanity for a half bath. If you are like us and have weird spaces in your home sometimes the ‘standard’ doesn’t work. Then you know the struggle of having to custom-build something. As with our half bath remodel, we were forced to build our own vanity because of the awkward space.
Disclosure: This post contains affiliate links, which means we may be compensated if you make a purchase through these links at no extra cost to you.

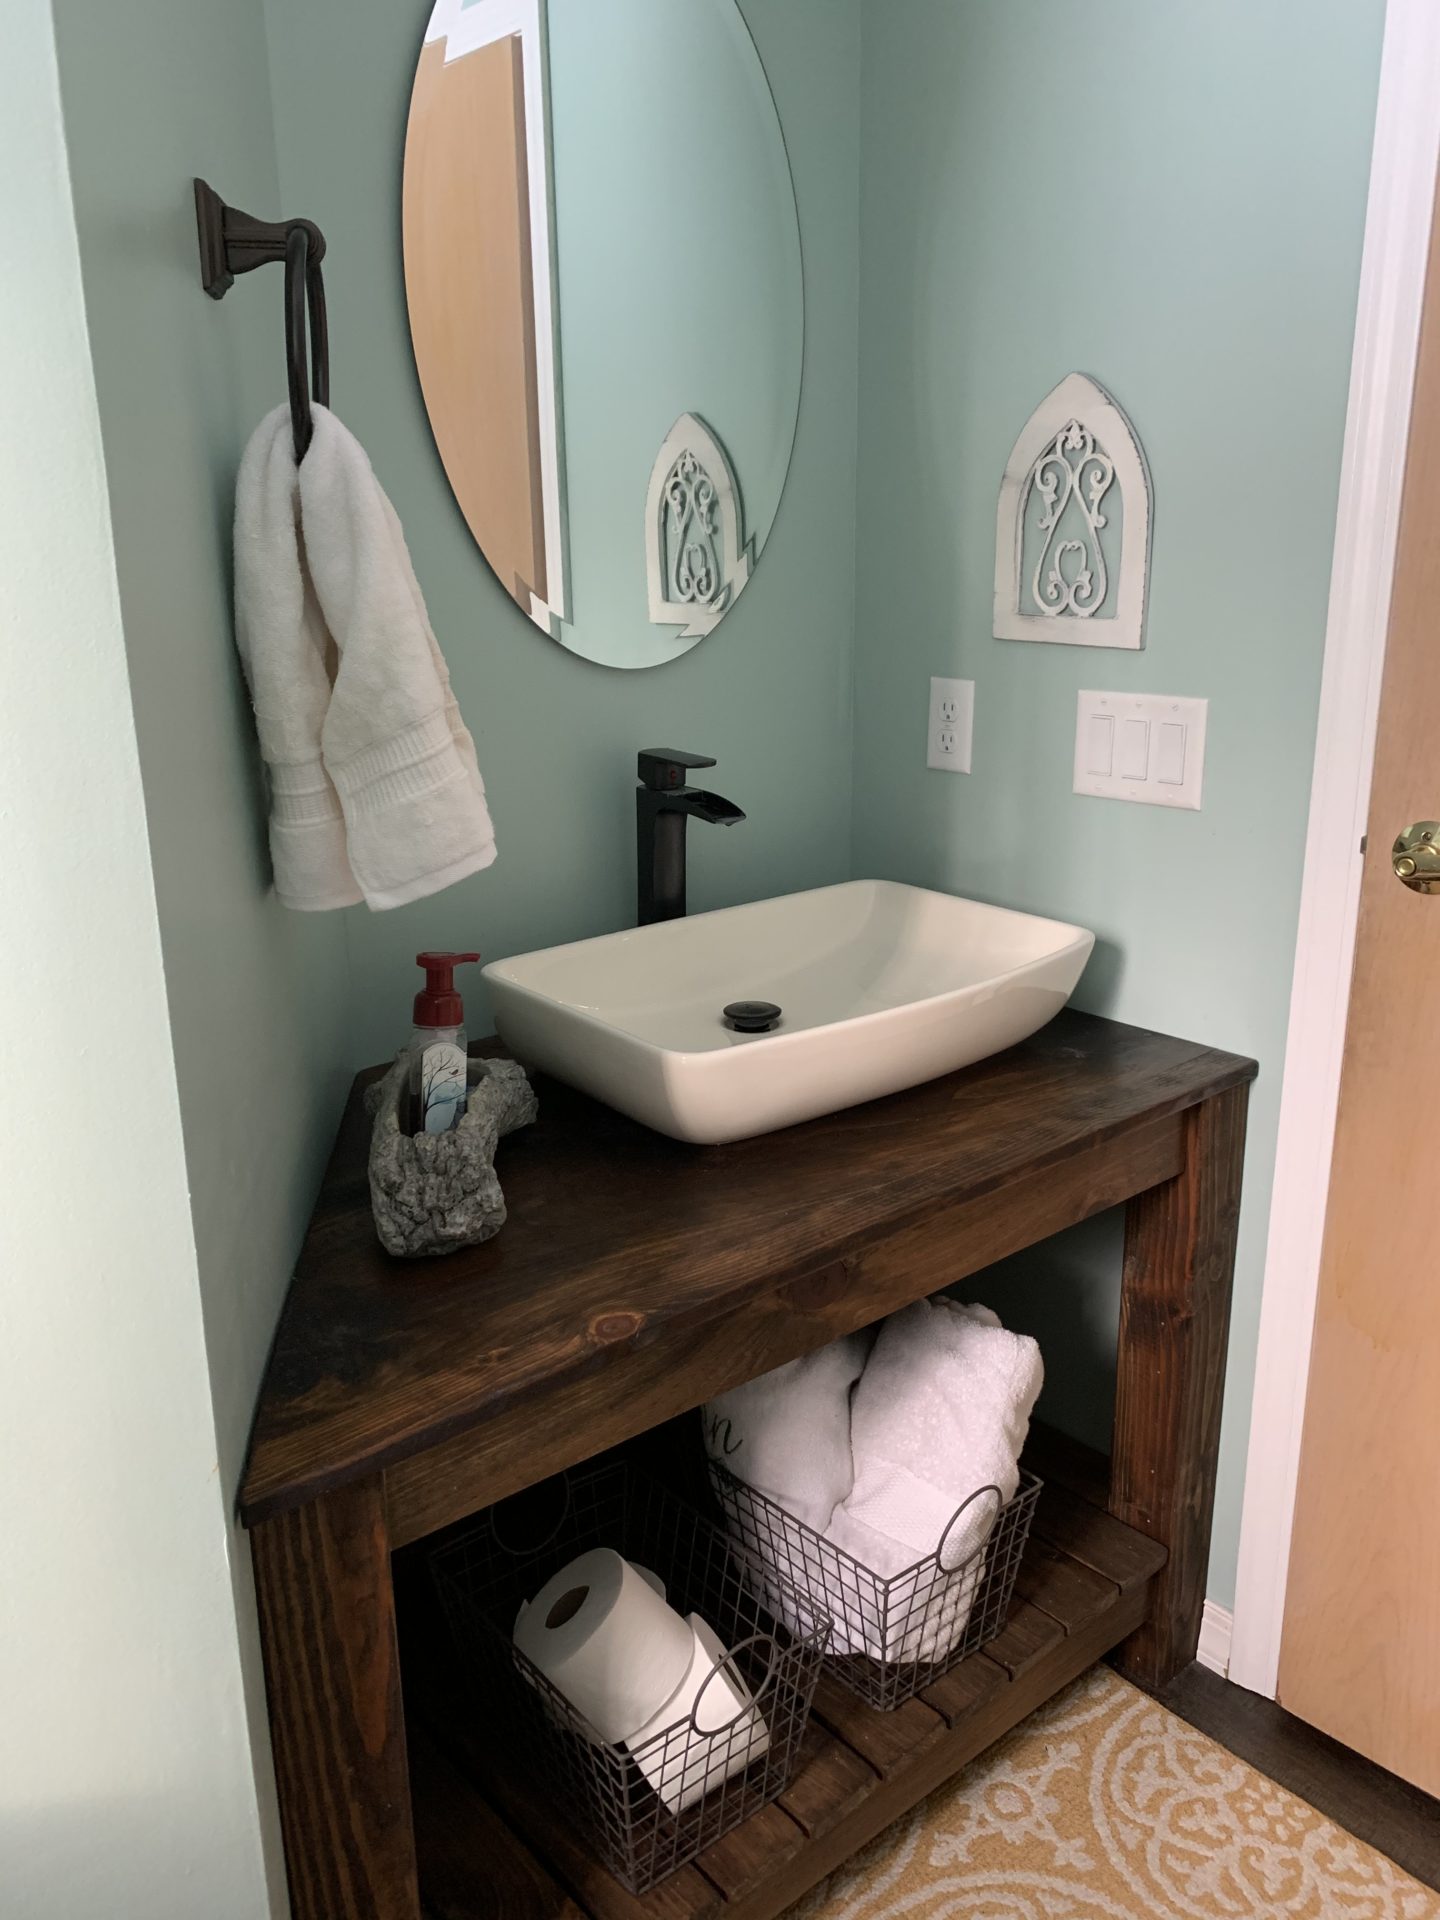
If you read our last post about our half bath remodel you might remember that we had to build our vanity in different parts and then like the Avengers ‘assemble.’ If you want to know the details on exactly how we got that done, keep reading!
Materials:
- Sink and faucet
- Minwax stain Dark Walnut
- Minwax Spray on Varnish (for waterproofing)
- 1ea – 1”x 12”x 8’ Whitewood Board (for the countertop)
- 2ea – 4”x 4”x 8’ Douglas Fir Lumber (for the legs)
- 3ea – 2”x4”x 8’ Whitewood Stud (for the frame)
- 2ea – 1”x 3” x 6’ Whitewood (for the bottom shelf)
How:
Remember as always use common sense when operating any power tool and practice safety guidelines at all times.
First things first
We measured 29.5” and cut the posts for the legs. Then we started the framing process. First by squaring off all the legs and then by cutting the 2”x4” stud to size to frame the supports for the vanity top and bottom shelf. After, we used the Kreg pocket hole jig to attach the framing studs to the vanity posts. Top sections were flush to the top of the posts and bottom sections were spaced 4” from the floor.

Once the top and bottom studs were installed we checked for level and plumb. Next up, it was time to work on the vanity top. We started by measuring and cutting the 1”x12” board, one side at 35 degrees the other straight. Because our vanity is approximately 26” in-depth, we had to join multiple sections of the 1”x12” using our trusty Kreg jig, biscuit joints, and wood glue. As we know not all walls are perfect, therefore minor adjustments had to be made. After 3 tries Marido finally got it to fit with minimal gaps between vanity top and surrounding walls.
We then took the opportunity to dry-fit the new sink. We determined the clearance from the wall, plumbing fixture and drain and marked that. After a quick push of the trigger with a hole saw attachment, we are all set with the countertop.

Now moving to the bottom shelf which was a breeze. We measured and cut multiple pieces of the 1”x3” at 24”. Most of them were straight cuts except the last few. Once the wall came to an angle we had to take the 35-degree cuts into consideration.


The Finish
All pieces have now been measured, cut and dry fitted in place. Now we are ready for staining, using my trusty new rags (Marido’s dingy undershirts, that just had to go!) I started to bring some depth and color to these plain pieces of lumber with a good rubdown using two coats of Minwax Walnut stain and voila! Like magic, we achieved a nice distressed rustic look to our new vanity. But there’s more! Ah! We need to protect the vanity countertop against water. Easy enough! We found Minwax spray-on Varnish for waterproofing. Three coats later we are ready to put this bad boy together.
Some Assembly Required
With impact driver in hand and a bag full of pocket hole screws, we put this thing together like a piece of IKEA furniture, no instructions needed as Marido says. We nailed into place 1”x3” boards for the bottom shelf using finishing nails. We caulked the sink base, as well as all the other fixtures. A quick wipe-down and there you go! Our DIY custom vanity for the half bath was done!


Quick, simple and cheap. If you liked and enjoyed this DIY, comment, and share below! Let us know what custom build you had to do for your home, we’d love to hear about it! For more bathroom ideas and inspiration make sure to check out Erica’s powder room refresh!
Sources for the finishes!


