
Before 
After
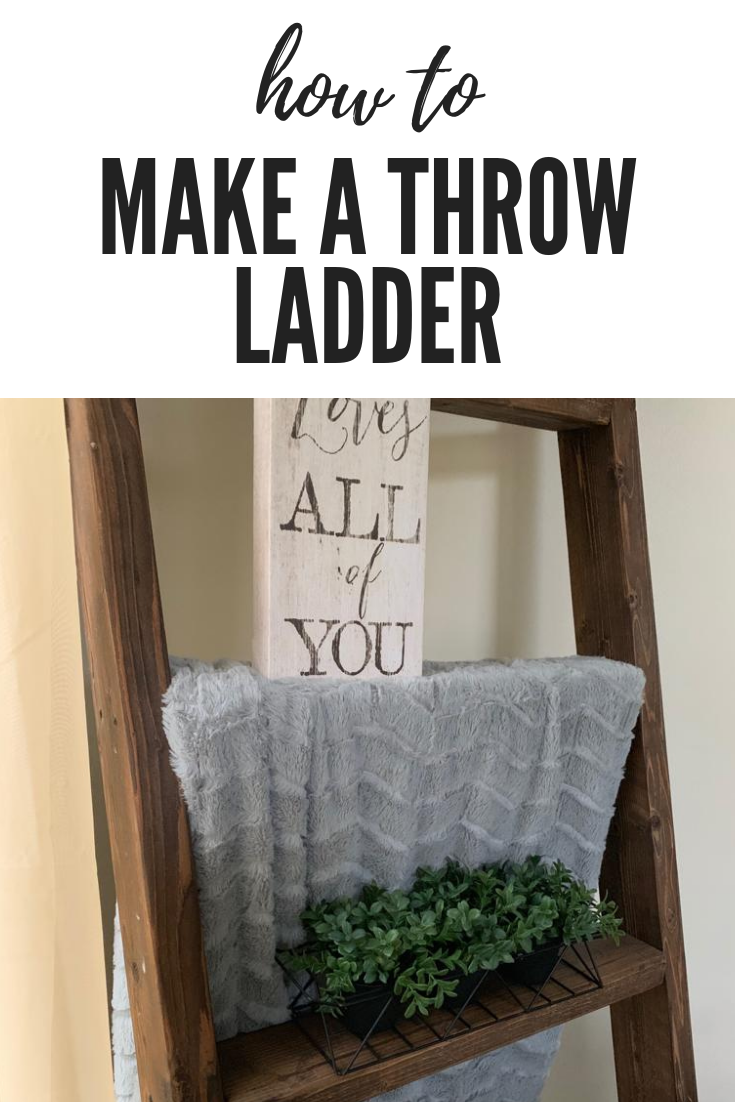
So today we will be talking about how to make a throw ladder using pallet wood. How did I come up with this in the first place? Well easy, I was staring at my living room and felt it was missing something, apparently a couch, 1 love seat, 1 accent chair and a coffee table are not enough to complete the room; there are little elements that can elevate the space so much more (literally and figuratively). So, as usual through my Pinterest binge of the day, I came across various ideas, but one caught my eye; it was a throw ladder, but you could use it even as a showcase for little nick-knacks that you want to show off. So, I decided to ask my dear husband (as expected) to whip one up for me 😄. And so, we did. In this post, we will tell you how we did it. It’s really easy and really cheap too! Win-win.
Materials:
- Large pallet, as a sacrificial lamb ( for the rails and steps)
- Box of 2.5″ screws
- Minwax Clear Varnish
- Drill
- Measuring tape
- Protractor Ruler
- Circular Saw
How we did it:
*** Safety First. Make sure you know how to operate any of the tools used before you start any project. We don’t want any severed fingers out there, this is not SAW. Plus we love you and we want you to be safe.***
Disclosure: The pictures are of the completed project, to help you have an idea of what the end project should look. At the time of the project, we were not thinking of writing a guide on how to create this piece, sorry!
Step 1
Dismantle the pallet. We used two of the stringers as the side rails for the ladder, these were about 2″x4″x6’6″ and had some nails. We kept the length and decided to leave nails in place (just hit them with a good-ol’ hammer a few times to make them flat against the rail so that it’s not a hazard) or you can pull the nails out but don’t fill the holes, this gives a bit of character and “rustic-ness.”

Step 2
We cut a few of the pallet’s deck boards for our ladder steps, measured and cut them at 18″ width and we ended up making 6 steps.
Step 3
We marked 18″ spacing on each of the side rails, drew a line at the mark with a 30-degree angle (this is so that you can lay the top against a wall and your steps lay flat).

Step 4
Attach the steps perpendicular to the side rail (you don’t want a lop sided-Tim burton ladder unless that’s what you’re into :p we don’t judge) by predrilling with a smaller bit so your wood doesn’t split (wink wink) and using the 2.5″ screws to attach the side rails to the steps.

Step 5
Sand and remove dust.
Step 6
Time for staining.


And there you go, a quick way to add a little something to a space. You can hang your really comfy throw blankets for those binge-watching evenings, or cuddle nights with hubby and the kids. You can also display portraits, plants, candles, pretty much anything that fits. Just use your imagination and do what you like. This is how ours look. Ahh! Now doesn’t that look much better?!
Hope you enjoyed this little tutorial! Please pin, share, and if you’d like try it out. Let us know what do you think; what would you show off on your ladder? Comment below!