
Ah! Nothing like retreating to a beautiful and cozy bedroom after a long day! Where you feel soothed and relaxed, except, in my case, we weren’t. Our master bedroom was the antonym of that. It was dark, cluttered, and not at all appealing. Of course, with some cleaning and organizing we got the clutter fixed, but what about the cozy and beautiful part? Sure, the ways you can improve the look of a room are as endless as your imagination, but that can come with a big price tag depending on how much change you want to make. In our case, it wasn’t much of a healthy budget. So, we decided to work with what we had, do our research and get to work with this DIY bedroom accent wall!

No master is complete without an ensuite and ours wasn’t the exception, with our tiny hideous master bath. Don’t get me started with our oddly shaped closet (more like a pathway to a dungeon)! As you can tell, our master bedroom wasn’t my favorite place in our house. And as promised by my Marido, upon the agreement we made when we purchased the house, we added it to the already long to-do list. We had big dreams and big plans but an itty bitty budget. We followed our own advice on how to fall in love with your home again and took it one room at a time. Thus, we decided to tackle the bedroom first, as we save and pray for the bathroom and closet.
Disclosure: This post may contain affiliate links. which means we may be compensated if you make a purchase through these links at no extra cost to you.
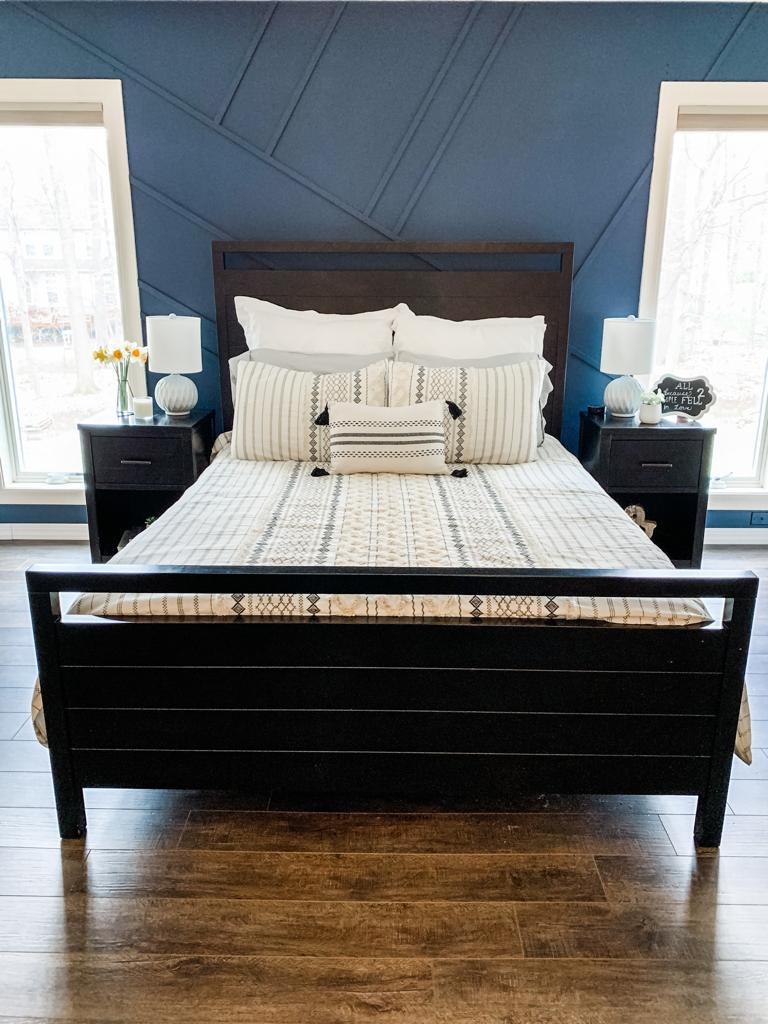
Our plan consisted of adding a bold geometrical accent wall, painting our DIY bedroom accent wall in Naval by Sherwin-Williams, while keeping the other walls a neutral light color and styling the space with light, bright decor.
Materials
- MDF *(We used Polystyrene Square Molding 3/4″x 1/4″x8′, but would not recommend this)
- Paint of choice (we used Sherwin-Williams Naval)
- Painter’s Caulk
- Tools:
- Nail Gun
- Chop Saw
- Speed Square
- 4′ level
- 320 Grit Sandpaper
Disclaimer: Please be careful while handling power and sharp tools, we don’t want to see you get hurt, we are not responsible if that happens so practice common safety guidelines when attempting this or any other DIY project. Thank you!
To Begin This DIY Bedroom Wall Project
We first cleaned up our space. We cleared all the furniture out of the way, removed the good Lord’s crucifix, curtains and rods and outlet covers.

Design Concept
We created the design by measuring the wall and window openings. With pencil and paper at hand, the rendering was completed. Not to scale because apparently Marido’s design juices were flowing and he prefers to do things the hard way…

Get Down To Business!
We repaired any drywall damage. Then we marked up the wall with the proposed molding locations. This ensured everything would line up how we wanted them. Next, determining our starting point; we drew a diagonal line across the wall from corner to corner. Because we wanted an asymmetrical wall we decided to raise the starting point 1ft off the ground (like the picture above) and installed the first section (the main trunk which is the longest piece across the wall) with a few nails, cutting the molding at a 35-degree angle. All secondary branches were at 90 degrees from the main trunk.

We used 6″, 25″ and 30″ lengths to provide variety to the layout. Once all pieces were installed, it was caulking time! Fill in all the nail holes, joints and seams between the drywall and molding. Once everything was dried up, we passed over it with a 320 grit sanding paper. After a quick wipe down to remove any sanding dust, we were ready for paint.

Again, we chose Naval by Sherwin-Williams. It took us three coats before we finally had a uniform color on our wall.

A Note On The Molding
All in all, we ended up purchasing a total of 9 pieces of 8′ polystyrene square molding. The take away here is that while this type of molding is lightweight, it is not easy to work with as it is not as forgiving as wood molding. All joints had to be butt-joints because a 45-degree scarf joint was not happening. Any attempt to cut the polystyrene molding would end up in damaging the finished side of the molding and in strayed fibers. So these are some things to take into consideration before using this material.
So why did we use this material instead of MDF? We did not want the molding to come out past the baseboard in the areas where they would meet and we could not find MDF stock that thin. Other ways around this issue:
- Remove baseboard altogether, run a strip of MDF, or whatever material you use, of the same thickness along the floor in place of baseboard, that way everything is the same thickness.
- Layer it up, by removing the baseboard, adding a strip of the same material thickness but wider, the run of the wall, with a reveal the same width as the material on the wall. Add blocking along the run of the wall, along the floor. Then you can reattach your baseboard. Need a visual? Check out what we mean in this easy DIY board and batten tutorial.

Now This Is A Retreat!
Big impact with a small budget! The first thing we did after finishing this project was purchasing a new bed set and “shopping” our home for decor to style our side tables. Now we feel like we can retreat into a beautiful master bedroom. As long as we keep the bathroom and closet doors shut, hehe!


Let us know what you think in the comments. What changes have you done to your bedroom space to bring it to life despite having a small budget?
Get the look!

