You know what we think is key to a happy marriage? Separate closets! We know, we know- first world problems, hehe. While we’re joking, we’re also kinda not! There’s nothing like having one’s own space; maybe you’re lucky enough to have a home office all your own, or a craft room or some other special place just for you. While our home is not quite large enough to pull that off, we still managed to carve out a space to create a separate closet for my husband. We share with you the why and how in this DIY built-in wardrobe post!
Disclosure: This post may contain affiliate links, which means we may be compensated if you purchase something through these links at no extra cost to you, for more information visit our terms and conditions page.
The Regret!
In 2008 when we built our house, even though the blueprint only afforded the closet to be 8 feet deep by 7 1/2 feet wide, we had the option of expanding the master closet out the full length of the garage. We would have loved to expand that space by opting for trusses that would’ve at least allowed us to expand in the future if we desired. Alas, we couldn’t afford to, so we settled. Womp, womp, womp.


Immediately, I regretted it but it was too late. I would have loved to have a huge master closet. Why? I don’t have a lot of clothes or anything. I just like the option of large spaces to create channels for organization. Still, it would’ve been magnificent! Welp, here we are stuck with a 8′ x 7 1/2′ closet for both my husband and I to share.
Not For Long!
My side of the closet was color coordinated and organized (because I have OCD). So was my husband’s side (again, because I have OCD and I do the laundry). But I no longer wanted to share. I wanted to be able to install a pretty closet system and space out my crap. We thought and pondered and then, it hit us! In a section of our room, there was an empty nook. It was original to the house plans, for built-ins that we couldn’t afford. As it turns out, it actually makes a great space for a built-in wardrobe! Commence evicting my husband from the walk-in closet! With the promise of a space all his own, we put pencil to paper and came up with a plan!
Note: While the dimensions of this wardrobe may not work perfectly for your space, the same methods for building it can be applied to any nook you may have in your home, and not just as a wardrobe, but for any type of storage.
Disclaimer: Remember to use standard safety guidelines and common sense when tackling this or any DIY project. Make your safety a priority.
The Goal!
We needed to create maximum storage in this little nook. I prefer to store bottoms and bulky hooded sweatshirts folded on shelves. Dressy shirts for work and church are always kept separate from casual items and hung on the rods. Therefore shelving and double hanging rods were essential.
DIY Built-In Wardrobe
Overall dimensions: 37 1/4″ x 96″ x 23″
Materials:
- 2 Sheets – 3/4″ Poplar or Birch Plywood
- 1 Sheet – 1/2″ Poplar or Birch plywood
- 1 Sheet – 1/4″ Birch Plywood
- 3 – 1x10x8 Poplar (Face Frame)
- Pocket Hole Screws
- Construction Screws
- Wood Glue
- Biscuits
- 8 Hinges
- 2 Cabinet Pulls
- Rods/Rod Sockets
- Paint/Paint Supplies
- LED Light Strips
Tools:
- Table Saw
- Miter Saw
- Router and 1/4 bit
- Biscuit Joiner
- Level
- Drill
- Finish Nail Gun
- Tape Measure
- Kreg Pocket Hole Jig
Step 1: Making the Cuts
After coming up with the dimensions, we made our cuts.
2 Side Pieces – 21 3/4″ x 94″ x 3/4″
Back Piece – 34″ x 94″ x 1/2″
2 Shelves (non-adjustable) – 21″ x 34 1/2″ x 3/4″
Top/Bottom Supports – 21″ x 34 1/2″ x 3/4″
Vertical Divider (for cubby area) – 21″ x 39 1/4″ x 3/4″
Shelves for Cubby (non-adjustable) – 21″ x 12 1/4″ x 3/4″
Door Panels – (2) – 13 1/4″ x 42 1/4″ x 1/4″
Face Frames Pieces – 1 1/2″ x 34 1/2″ x 3/4″
Door Stiles – 1 1/2″ x 88″ x 3/4″
Door Rails – 1 1/2″ x 13 1/2″ x 3/4″
Step 2: Prepping the Install Area
We started by pulling back the carpet and removing the baseboard. The space we were going to build the wardrobe into had a partial wall on one side, about 14 1/2″ deep. For this wardrobe to be overall 23″ deep, we would be able to see 8 1/2″ of the wardrobe exposed. In the end we dressed it up with trim and painted.

Step 3: Face Frames on Exposed Plywood
The top and middle shelves, as well as the cubby divider and shelves, would all have exposed fronts. To cover raw plywood edges, we attached face frames by using a biscuit joiner, biscuits and wood glue. We allowed the middle two shelves to have a lip which would help hide the LED lighting strips. Face frames on all the cubby pieces were equal to the length and thickness of the shelves, by 3/4″ deep.
Step 4: Attaching Long Horizontal Shelves
Knowing where we wanted each shelf to land, we cut spacers to use as guides for making sure that every shelf was consistently placed. This was done by clamping the spacers and the shelves (or just a 3/4″ slice of wood to mimic shelf thickness/width). After laying down one side panel, placing our spacers and shelves, we drilled pocket holes. At 3″ from the bottom, the first shelf was attached. The second shelf was placed at 40″ from the bottom shelf. The third shelf is also 40″ from the second shelf. Lastly, the very top shelf is placed at 6 3/4″ from the third shelf. Then, we flipped that part over onto the other side panel. Taking the same procedure, we attached the shelves to the other side.


Step 5: Vertical Cubby Divider and Shelves
We drilled pocket holes for the cubby divider and cubby shelves. Now that the case can stand up tall, we placed the divider at 12 1/2″ from the left panel. It was attached by pocket hole screws. Once that is in place, we spaced evenly and installed the cubby shelves between the side panel and divider.

Step 6: Back Piece
For the back, we cut out an opening to allow the existing outlet to be extended and accessible. Then we attached the back to the case using screws.

Step 7: Put the Case in its Place
We looked for the studs in the nook. Then we shimmied the case into its permanent home. Keep in mind, you always need to check for plumb and level. Use shims as necessary. Stud location in mind, we affixed the case to the studs at the very top and bottom of the unit. That way it would not be seen.


Face Frame:
We applied the poplar face frames by using finish nails and wood glue. The face frame covered the open area at the very top and bottom of the built-in wardrobe. We framed out the exposed side, giving it a decorative look.


Step 8: Doors
Building doors isn’t quite a task for beginners. However, we will share how we built the doors on this DIY built-in wardrobe unit. If this is new to you we encourage you to do more research and give it a go!
First, we measured the opening area. Measure the width of the opening at the top and bottom, as well as the length of both sides. This way you find out how square (or not) your opening is. Now, you can build your doors to your opening, without assuming you have a perfect rectangle.
Now we need to determine what’s the spacing that we would like between the case and the doors. For our particular case, this spacing was dictated by the type of door hinge that we chose. The door hinge gave us an 1/8″ spacing. Knowing this spacing, we were able to determine our overall door dimensions. See figure below, for reference.

The Stiles (vertical pieces):
The stiles were cut at the full length of the doors. Using a 1/4″ router bit, we routed a a groove that was 1/2″ deep, throughout the entire length of the stile. The groove was done in order for the panels and tongue parts of the rails to be able slide in it.
The Rails (horizontal pieces):
The rails were cut at length equal to the width of the door plus 1″. This 1″ was added to account for the tongue part of the style. The styles had a 1/2″ tongue on both sides of it. Using a 1/4″ router bit, we routed a groove that was 1/2″ deep, throughout the entire length of the rail. The groove was done in order for the panel to be able slide into it.
Panels:
We cut to size two panels. The panel size was enough that it would be able slide in between the stiles and rails.
Assembly:
Using wood glue, we attached the rails to one of the stiles. After that we inserted the panels and then the other stile. Once it was all assembled and glued together, we clamped it all together.


Door Install:
Since the doors were pretty long, we decided to use four door hinges per door. Once we came up with the correct location for the hinges, we install them to the case. After that, we placed one of the doors in the case. Using shims we made sure that our spacing from the top and bottom were the same. The next step was to attach the other part of the hinge to the door. We repeated these same steps for the other door.

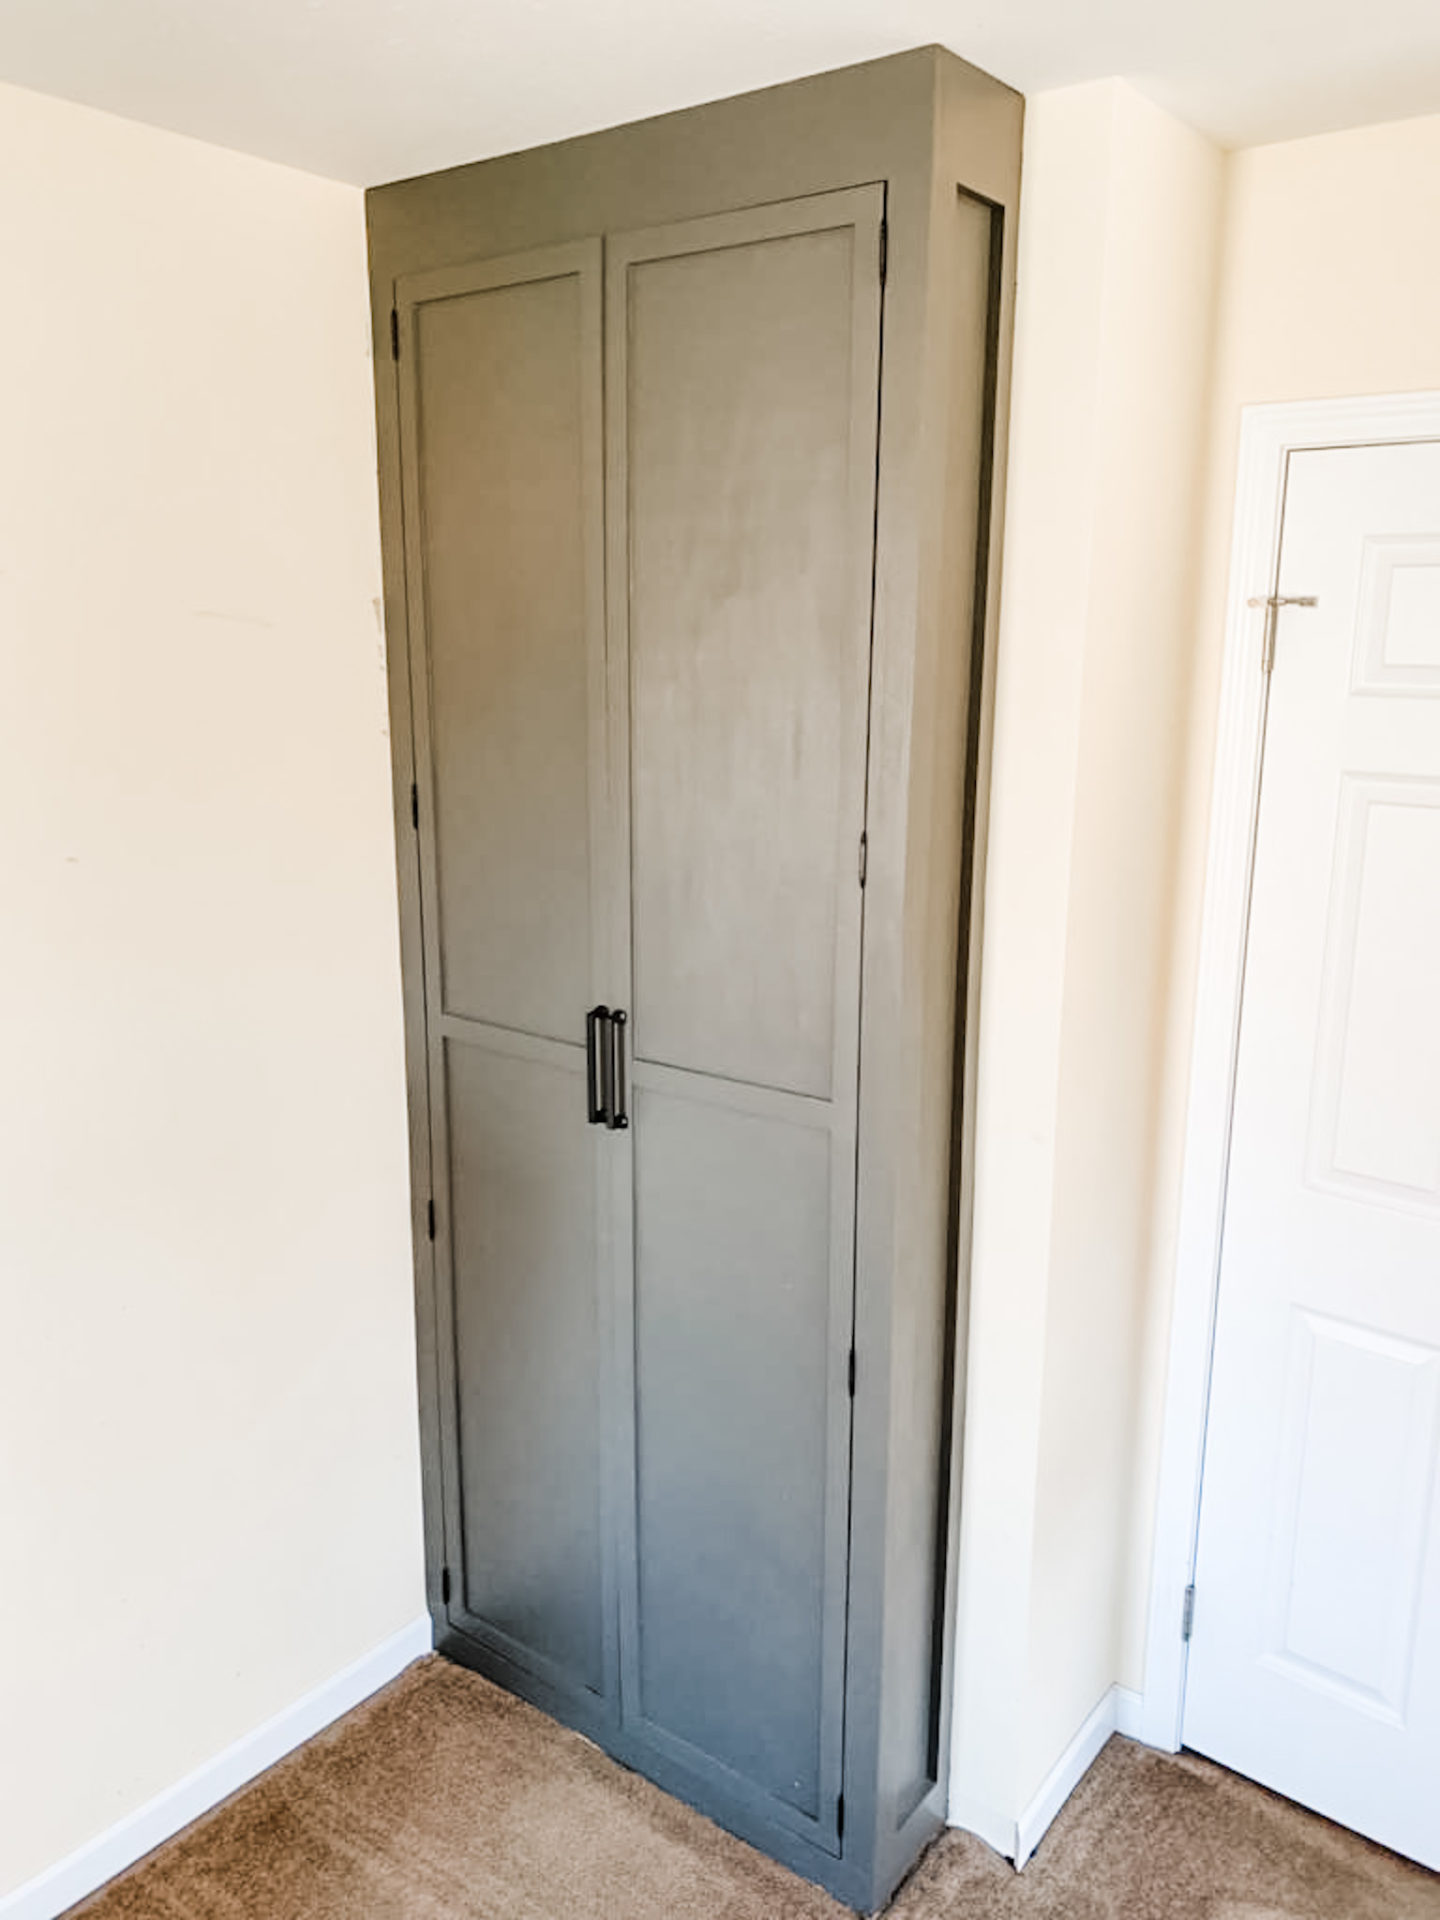
The End Product!


Our DIY built-in wardrobe is now completed! Now that I have the walk-in closet all to myself, it’s sad and half empty. But, hey, I’m sure I’ll figure that one out 😉
If you enjoyed following along with our DIY built-in wardrobe, you may also enjoy reading about our DIY mudroom build. If you enjoyed this little project, share and spread the creativity! Tell us how you over came storage issues in your home, in the comments below!
Products similar to those we used:


