Now that the weather is getting warmer and warmer, it’s time to bring those tools outside and do some outdoor projects. Remember that front porch pergola DIY from a few weeks back? Well in continuation of our outdoor projects, today we bring you our DIY floating deck, which we fondly refer to as our boardwalk.
One of the features of our property, which we love, is a storm pond next to our house. Its pretty and gives us some distance from our neighbors. However, it sits right next to our house and the grade along this area is pretty steep. It was a hassle (and almost an episode of 1000 Ways to Die) whenever anyone walked around the side of the house. They had to be extra careful since it was more like a cliff leading into an abyss where a huge snapping turtle was waiting for you. Just kidding! (About the abyss, not the snapping turtle, aka Nessy) 😀


Back to the DIY floating deck! Because of this, my husband decided it was time to do something. In our minds, we imagined a boardwalk-like walkway with a railing for safety. Perhaps even an addition of stairs leading to the pond. That way you can appreciate better the wildlife (and Nessy).

For this project, we will divide it into 2 parts since we have only built the first part of this. We are still debating if to continue as in the drawing or just leave as it is.
Materials
- Pressure treated lumber
- Deck screws
- Jigsaw
- Chopsaw
- Measuring tape
- 4′ level
- Posthole digger
- Kreg Pocket hole jig
- Quickrete
Preparation
First, decide on what you want and the design you are going for. Consider calling your town and check with your local building inspector to figure out if you need any type of permit for what you want to do. Second, gather all your materials and safety gear needed for this DIY. And third, roll up your sleeves and get to work 😀
Disclaimer: Please remember to practice standard safety guidelines and use common sense. We are not responsible if you get injured while attempting this or any other project that we share with you. Our goal is to provide inspiration and information to the best of our knowledge to you lovely people out there.
The Foundation
Before we start any building we need to prepare the area where we are going to raise our boardwalk. The first thing we did was dig to level out the ground (remember the cliff to the abyss).

Once we had the area level, we measured and marked our post locations every 6ft using the post hole digger (PHD). We dug 18 holes at 3ft depth and installed our 4″x4″ post with a Quikrete footing. Follow Quikrete instructions per manufacturer recommendations. We made sure all our posts were leveled and plumb on all sides. After a day or so of dry time we started working on the framing for our boardwalk using 2″x10″x12′ pieces of treated lumber and 3/8″ x 5″ exterior screws.

After the frame was built we added cross members every 6ft to tie the main runs to all other posts. We measured and cut the exterior (pond side) post to 40″ and all interior ones flush to the frame.


The Installation
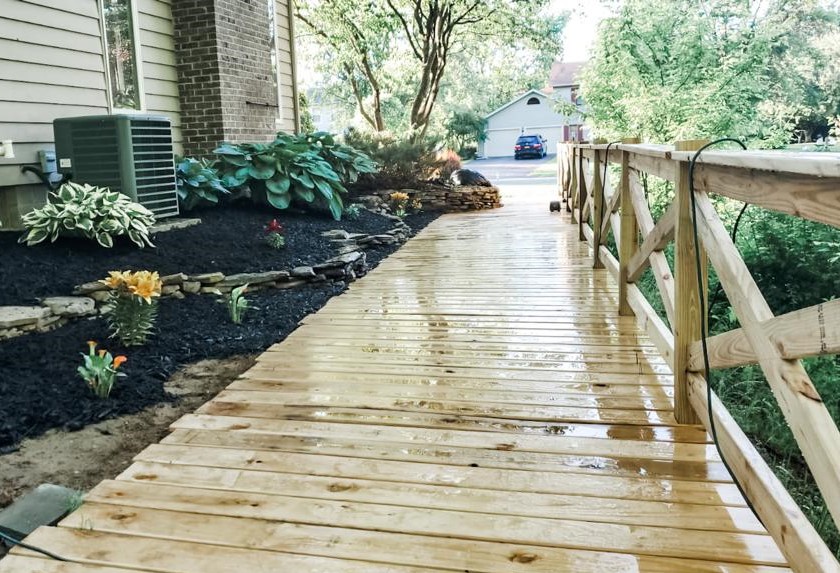
Using a 3/8″ spacer we started installing our deck boards. Since we liked the rock knee wall at the start of our DIY floating deck, aka boardwalk, we ended up cutting the boards to fit the contour of it.


For the railing, we followed the same steps as we did on the front porch so go on over and check that out for more instructions.


The Accents
After all the hard work was done, we noticed our landscaping was not up to par, so we decided to do a little sprucing up. We reworked the flower bed. The addition of new flowers and mulch did the job!


The End
And we are done! As you can see we finished half of our DIY floating deck and we are extremely pleased with how it turned out. Not only has it improved the side yard transit but it also serves as a great spot to sit and watch nature!


We hope you liked this easy DIY. Let us know what you think. Should we continue the original design and build the stairs? What DIY’s have you done lately for your outdoor living? Comment and share below.