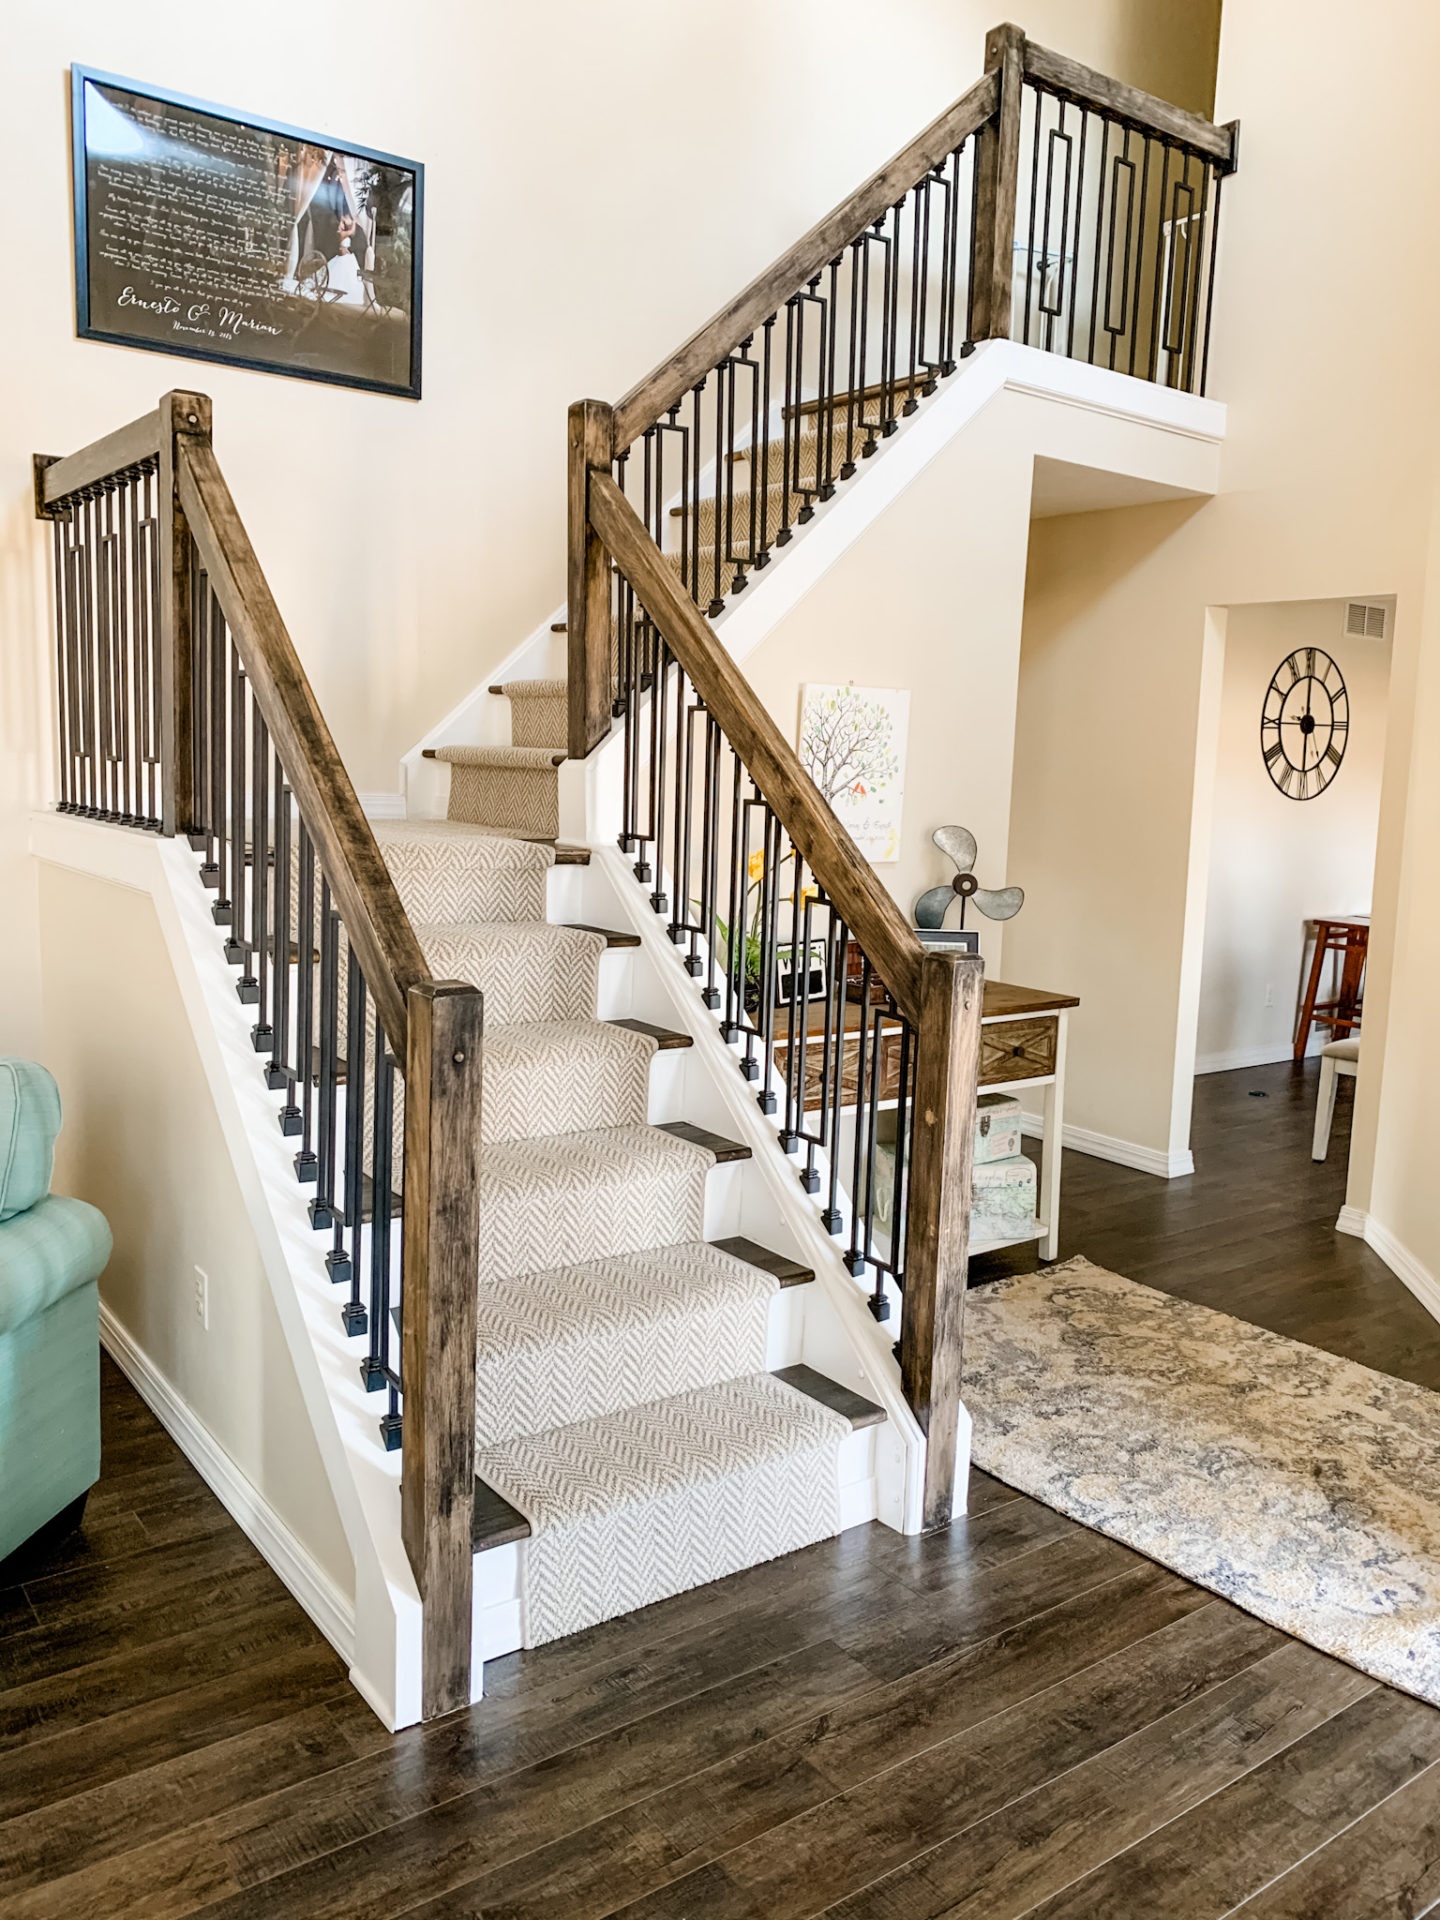
Mudroom check, fireplace check, floors check, half bath check. After giving a facelift to our foyer, it was time to tackle the elephant in the room. I’m not talking about the chandelier (I’ll get to you soon enough), I’m referring to our staircase. As promised, today we bring you our DIY staircase remodel.

In this post, we will describe how we remodeled our staircase. As you can see before, it was covered in carpet from top to bottom with a white oak wood railing. Not that it was a bad thing, it’s just that it didn’t go anymore with all the changes we had made to the house.

The Idea
Now the project itself was not so hard! Once you know what style you want, you just have to gather the materials and get to work. In our case, we wanted to switch out the oak balusters for iron. Yet we wanted to reuse and color match the wooden railing and posts to the rest of the house. To set it all off we would add a runner as it would help protect the treads. Necessary, since we have a lot of foot traffic from time to time. For this exciting DIY staircase remodel we did just about all the work ourselves except for the runner. We hired that out for various reasons: because of having to bind the carpet (not a DIY job), and a visit from our family for the holidays was closing in and we needed to have that done asap!
Next, we will list all the materials/ tools we used and how we achieved our fabulous staircase!
Materials
- White paint for trim and the risers
- Gel stain (3 different shades to achieve a similar look of the floors).
- Wood filler
- Sand paper 220, 120 grit
- Painters tape
- Old rags aka Marido’s old t-shirts
- Iron color balusters
- 1/2in x 12in board (for the landing)
- 3/4 round trim
- Liquid nails
- Caulk
Step 1
First is demo day!!! We removed what was left of the old carpet, pulling out any staples or nails left behind. As you can see from our pictures, our staircase has an L shaped landing.
Step 2
We purchased pine treads and risers from our local home improvement store, measured and cut these to size. Our staircase is 37.5″ wide. Once these were cut we did a quick dry fit to all pieces to ensure we weren’t going to have any issues during final assembly. No one has time to cut a finished piece. We used multiple gel stains (black, grey, brown) for the treads to achieve the color consistency and variable stain pattern within our vinyl floors.
We laid out all treads and started to stain each one in “random” strokes with each color until we were satisfied with the look, letting it dry between stains. Finally, once all were dry, we applied 3 coats of clear satin gel to give it a bit more protection due to the foot traffic.
Step 3
We used the 1/2in x 12in boards in 4 sections for the landing by butting them together. Also, the treads and risers were secured using a mix of liquid nails and brad nails, to ensure they would not move while the liquid nails dried.
Step 4
Next on to tackling the railing! Using our trusty hammer and pry bar we quickly removed the wooden balusters. Then a quick pass with 220 grit and a nice wipe down and it was ready for staining. Similarly, we used the method previously described; stain color #1, let it dry, stain color #2, let it dry, stain color #3, let it dry. Finally, two coats of clear stain to lock everything in.
Step 5
Being extra, extra careful using a jigsaw we measured and cut the new balusters. We covered the bottom plate of the jigsaw with painters tape and the balusters on the cut points to protect the factory finish from being marred.
We installed the balusters and yes… a little more liquid nail to fix the baluster to the bottom board and railing (Marido seemed to be impressed by how quickly it set up and how good of a job it did, and so went Oprah on anything that was loose around the house… “you get liquid nail, you get liquid nail and you, liquid nail for everyone!!!).
We measured 4in separation between balusters and drilled with a 3/4in spade bit at each location on the bottom staircase board and railing. Upon completing, we painted the bottom board and trim white.
Step 6
Once everything was installed and the glue was dry, we proceeded to clean up, complete any touch-up paint and caulk all the seams.
A few days after, our runner arrived and was installed within a few hours! Nothing quite as gratifying as seeing the finished product.

Ah, now it feels like it belongs and we can check that DIY staircase remodel off the to-do list!
So here it is, let us know what you think? Have you taken on a similar project like this, what’s the next project on your to-do list?


