
Do you have scrap wood laying around? Looking for an easy way to upgrade your curb appeal? Well, today we bring you a quick and easy DIY house number sign tutorial to help you spruce up your homes curb appeal!
We are constantly trying to love our home again by working on a project around our house. 90% of the time that involves some kind of woodworking. As such, we always have a lot of scrap wood laying around. And as a believer in second chances, I refuse to let Marido throw them out before considering what other use we can find for them.
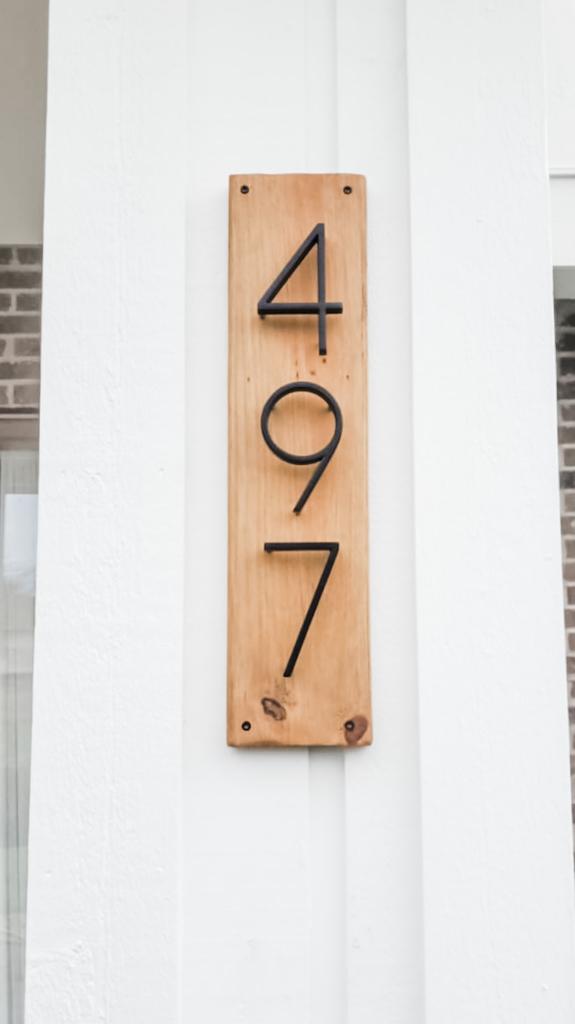
We had been talking about replacing our house numbers and making them more appealing, and after searching for inspiration we got an idea of what we wanted. This easy DIY house number sign tutorial consists of placing the numbers in a vertical position on a piece of wood and placing it wherever you’d like it displayed. Like magic, improved curb appeal! We’ve taken other approaches to improving our curb appeal, and if you’d like to take on a larger project, you could try building a DIY front porch with pergola, just to mention one. But that we will leave for another post ;).
Disclosure: This post may contain affiliate links, which means we may be compensated if you buy something through these links at no extra cost to you.
Now let’s get down to business!
This easy DIY house number sign would be considered a beginner level project as its super easy. All of the materials we used we had laying around and were leftovers of past projects, except for the numbers which were bought (a long time ago….can somebody say laziness?). But fell free to reuse your existing house numbers.
Materials
- Scrap wood (we used 5/4″x6″x24″ Pine)
- Stain of choice (we used leftover Valspar Cinnamonwood)
- Numbers (you can reuse the old numbers)
- Hammer
- Drill with recommended bits
- Orbital Sander
Disclaimer: Before attempting any project remember to use common sense and practice standard safety guidelines. And careful with those fingers!
The How!
First, we sanded our scrap wood with 120 grit to level out any imperfections. Then we used 220 grit until it was as smooth as a baby’s bottom and then wiped down the plank with one of Marido’s old tees.

At this point we laid down our numbers and determined the appropriate spacing between them. Using the manufacturer’s template we marked our mounting holes for our numbers and to mount the plank on our column. We pre-drilled all holes using a 1/8″ bit and finished them off with a 3/16″ bit.

Now the plank is ready for staining. We had Valspars’ Cinamanwood semi-transparent stain and with a brush in hand, we applied one coat.
After it dried we placed the numbers on the plank using the manufacturer-provided hardware, in a vertical pattern, following the instructions that came with them.


Finally, we figured out where we wanted to place them on our house and with the help of our trusty ladder we installed them in their final resting place. All done!
See! Short, simple and sweet. Hope you liked this quick and easy DIY house number sign to help improve the appearance of your home. Let us know what have you done to instantly boost your curb appeal? What tips do you have? Share and comment below.
For similar numbers to those we used, check out this product!
