Today I have for you ladies and gents the first project we ever did in our house… epic music… a closet to mudroom area conversion!

Before 
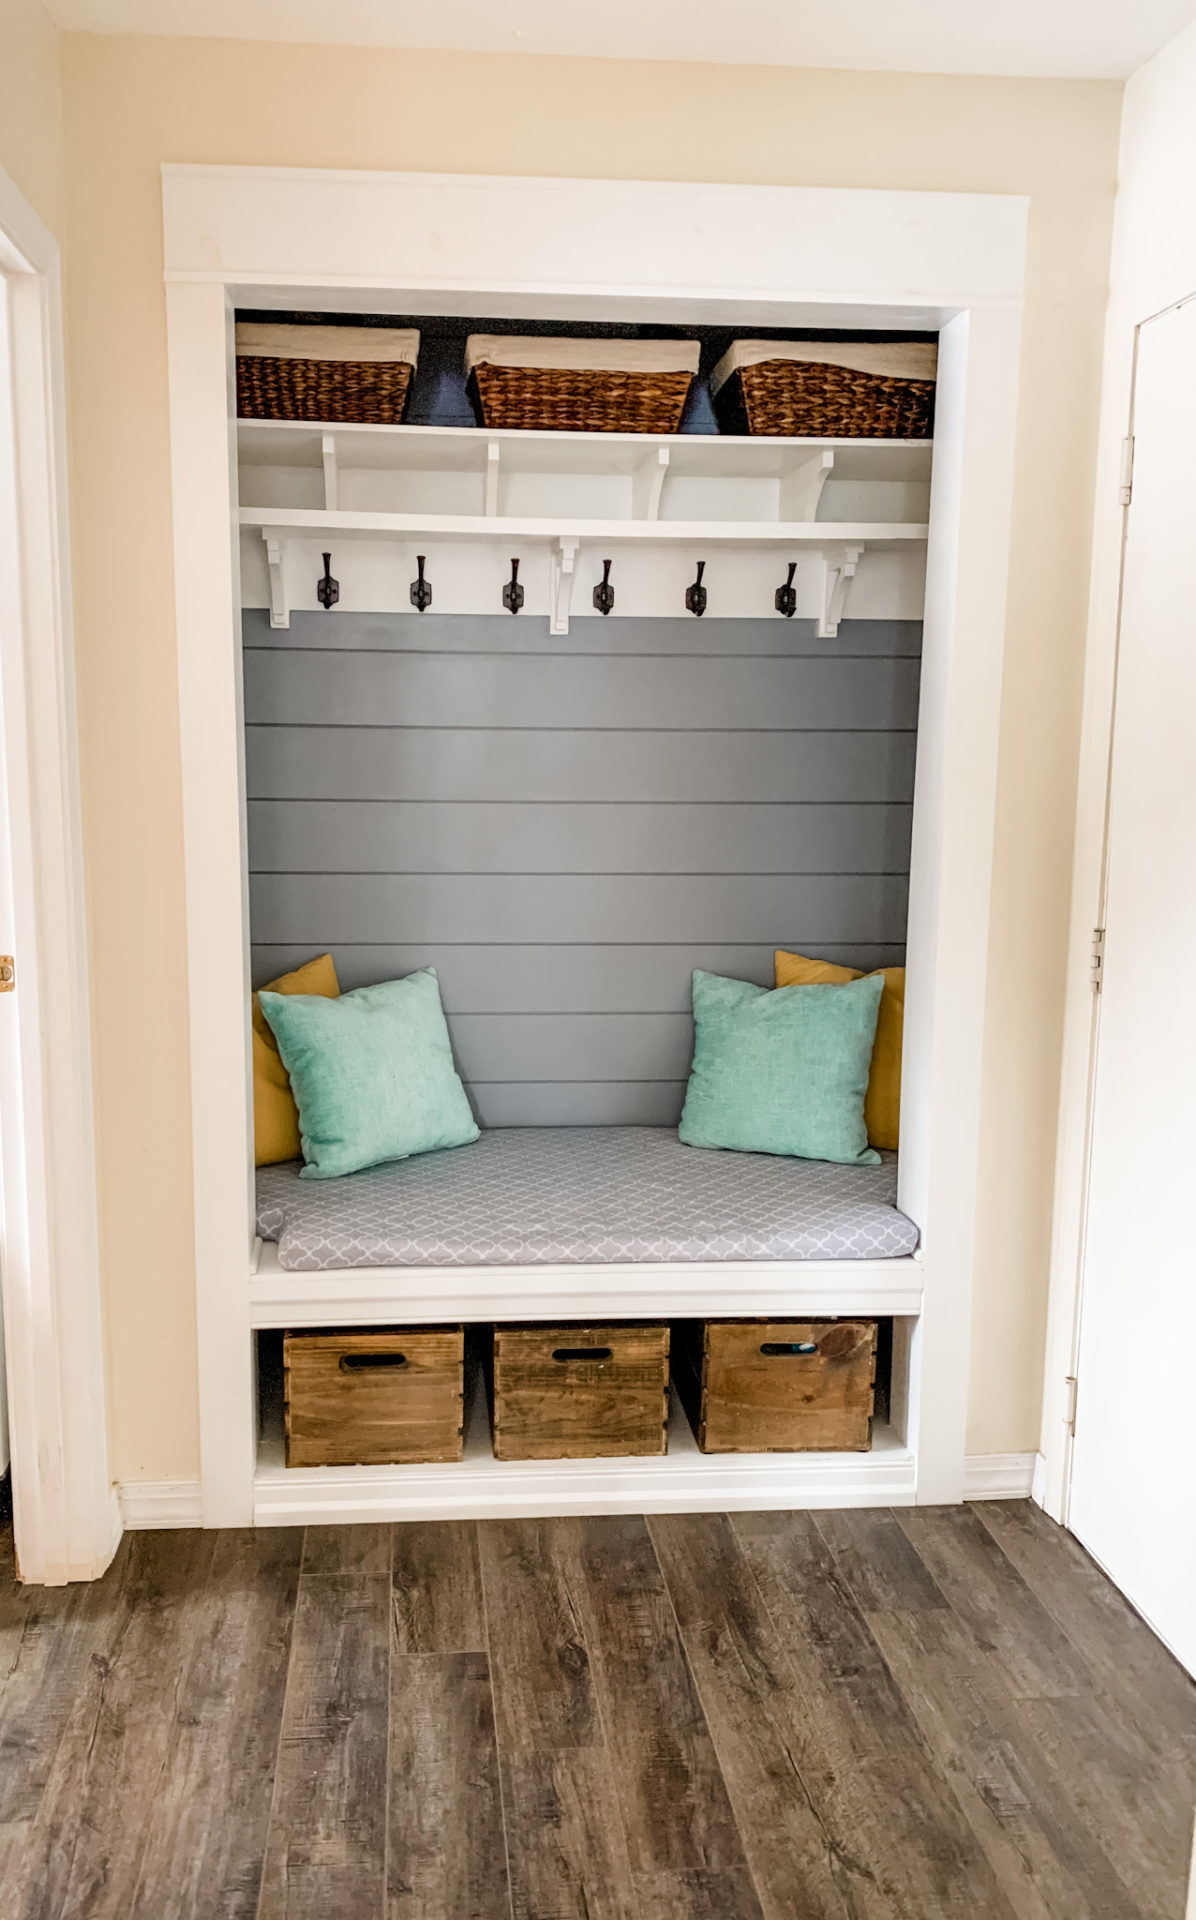
After
Disclosure: This post may contain affiliate links which means we may be compensated if you make a purchase through our links, at no cost to you.
We originally had just a little closet off the garage entry that led to our laundry room and half bath areas, by the kitchen. As I was browsing on Pinterest, I saw a bunch of inspiring ideas on how to create a mudroom area out of a closet and decided to ask my Marido if this was possible. As always, my dear husband said anything for you my love and began work with the help of his brother, his dad, and mom, who were visiting that summer.
During this project, I was out of the country working to get my license as a doctor in the Dominican Republic and my dear Erica had to fill in for me as project manager. Modesty aside they did an amazing job. Moments like that make you realize how important is to have family there to help you and be there for you. Even if it’s just to build a mudroom out of a closet.
Without further ado, let’s get to work.
Materials:
- 1/4” full sheet plywood
- 2” x 4” pine stud
- 1” x 12” pine board
- Paint
- White: for trim
- Gray: for walls
- Brad Nails
- 2-1/2″ wood screws
Tools Needed:
- Impact driver
- Drill
- Chop saw
- Table saw
- Nail gun
- Level
- Tape measure
- Speed square
- Kreg pocket hole jig
- Wood filler/ caulk
For Décor Accents:
- Crates
- Minwax dark walnut stain (for crates)
- Baskets
- Cushion
Disclaimer: If attempting this project remember always to practice safety guidelines when operating any power tools, use common sense and stay safe. We are trying to create beautiful things here not die in the process.
How:
We will break this section into 3 parts for better understanding the process; prep/demo, bench, and shelves.
Prep/Demo
- Removed sliding closet doors and guides.
- Took down the wire rack.
- Removed baseboard trim within the closet.
- Filled holes in drywall caused by the removal of drywall anchors for the wire rack.
- Fill and sand any imperfections.


Bench
- Marked studs within closet walls.
- Determined appropriate seat/bench height, in our case we chose 18” from floor level.
- Level and anchor the first 2”x 4” on the back wall
- Built the bench frame with 2”x 4” runs spaced 18” apart
- Install front section of 2”x 4”
- At this point we had the floating frame of our bench seat built
- We measured and cut to size 1/2” x 12” pine board sections for the top of the bench and raised floorboard


Then we thought, why not add faux shiplap? So we did by cutting a 1/4” x 4’ x 8’ pine sheet in 6” strips. Using our trusty new nail gun, we installed these 1/8” apart.


Shelf
- We created one shelf with cubbies for beanies, gloves, and any other misc. seasonal items. Using 3/4” x 12” pine board, we installed the first shelf at 70” and built a second shelf on top of it, leaving 6” between.
- Here comes the millwork! Instead of purchasing shelf brackets we decided to make our own! Jigsaw in hand, we used 3/4” x 6” pine board, traced our design and started cutting and sanding it down until we were satisfied with the outcome… now repeat 3 more times.
- We installed with wood glue and screws creating 5 cubbies.


After everything was installed, we started to prime and caulk the mudroom. We painted the walls a nice mid-tone grey and painted the shelves, bench, and raised floorboard white.


We found some baskets and crates (that we stained) and had our wonderful mother in law custom make the bench cushion.


Ta-dah!!
I can fully say this was a labor of love from everyone around me. Needless to say, this is a very special project for me that will always remind me how special my family is.


And that is how to create a mudroom area out of a closet! Hope you enjoyed this little transformation! Let us know what you think, comment, and share below. If you can’t get enough of mudroom conversions, go check out Erica’s mudroom!
Get the Look!
Here are some similar pieces of decor that we used to style our mudroom.


