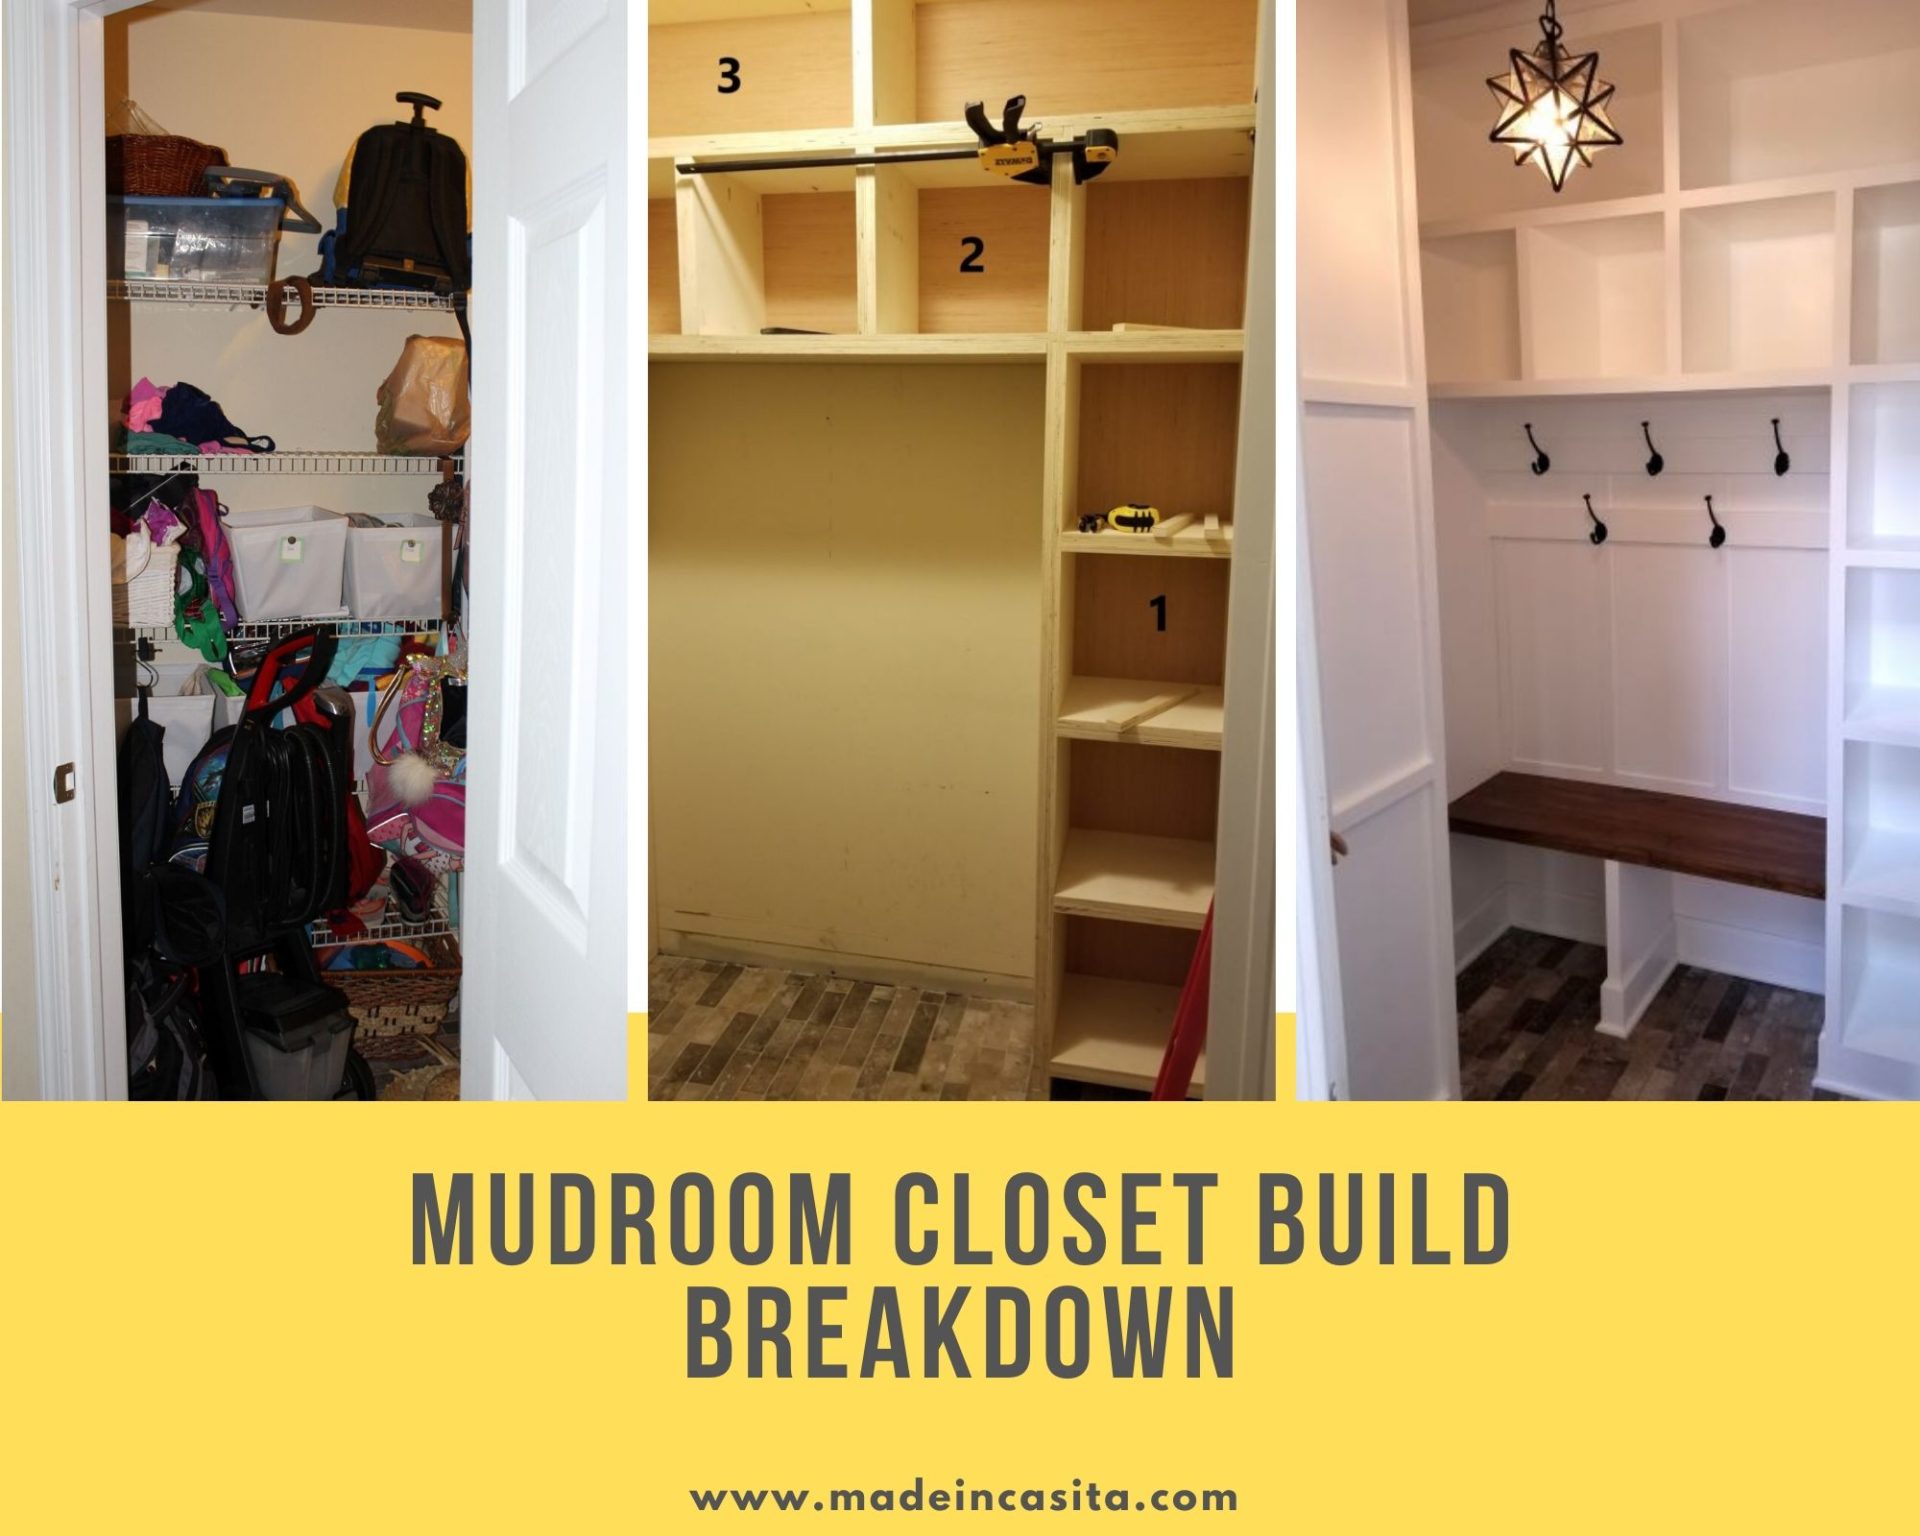

Before 
After
Welcome to our mudroom-closet build breakdown. If you have read the previous post about our mudroom closet renovation then you may be here looking for more details as to how we did it. We hope this post will be helpful if you should want to try a similar DIY project. We used some simple and basic casework techniques. Note: This is more a guide than an instruction ‘manual’, consider this an intermediate difficulty level. If you should feel inspired enough to attempt a project similar to this, remember as always, use common sense; know your tools, how to use them safely and put in place proper safety precautions. (Note: see our disclaimer page).
First thing we did was come up with an idea of what we would want out of the space as far as functionality and aesthetics. The most important part of the mudroom-closet build was not in the “building” so much as the planning. Once that was narrowed down we took measurements of our space. Then we looked for standard measurements needed for hanging two rows of coats, backpacks and baskets. We also we measured my husband’s shoes, which are the largest shoes in the house. This helped us to come up with a depth for the shoe cubby unit. Tip: Before we make the cubbies we buy the baskets so that we know they are going to fit.
Step One

Front view case 1 
Side view shoe cubbie


Case 1: Double hanging coat unit
In the picture, you can see that case 1 is already adjoined with the side case (shoe cubby unit), but they are not attached yet. For case 1 there are:
- 2 long side pieces ¾” plywood (almost 8 ft long, by 16″ wide)
- 1 large back piece ½” plywood (almost 8 ft long, by 23 ¼” wide)
- 3 shelves ¾” plywood (cut at, 21 ¾ ” long and 16″ wide). One at top, one at bottom, and one dividing in the middle. The middle shelf is doubled up. This is because we wanted to have a 1 ½ inch face frame, with no lip.
The shelve pieces are attached to side pieces by pocket hole screws. The back is fastened flush to the side pieces, connected with screws. Then the whole unit is attached to the wall studs with cabinet screws. To maintain 1 ½” space where case meets the wall, we used spacers.
Step Two:

Side case: Shoe cubby unit
Note: The shoe cubby unit is butted up to the double rod hanging unit (case 1).
To build this we need:
- 2 side pieces ¾” plywood (8 ft by 11 ¾”)
- 10 shelves, 3 non-adjustable shelves (top, middle, bottom) and 7 adjustable shelves. The middle shelf is doubled up ¾” plywood, using wood glue (13 ¼” wide by 11 ¾” deep)
- 1 back piece, attached flush to sides using countersink screws (8 ft long by 14 ¾ ” wide)
We cut the sides and back the same height as coat unit. Then we drilled holes for shelve pins (we used a Kreg jig). Next, we attached 3 non-adjustable shelves, using pocket hole screws and then attached the back piece. We drilled countersink holes so the screws don’t interfere with the units standing flush together. Then we attached the two units together through the back. They are screwed together above the top shelve and below the lowest shelf, so it isn’t visible. Then the unit is secured to the studs as well.
Then we used 1 ½” wide face frames to cover all exposed edges, including on shelves. Except at the very top and bottom shelves (where it meets the ceiling and floor). Those face frames were 4 ¼” tall (top) and 6 ¼” tall (bottom).
Step Three:

Case 2: Cubbies with Bench and Hook Area
Case 2 – Section 1: The vertical five cubby unit
The back and side pieces were all even length. The unit is 13 ¼” deep, and the shelves are 13 ½” spaced apart. Everything is attached by pocket holes. Again we used ¾” spacers between the side of the unit and the wall. Make sure it’s square, plumb, and level before attaching to studs.
Case 2 – Section 2: The three cubby unit
We built this unit the same as the one before. This was definitely a two-person job while holding in place and checking for square, plumb, and level before attaching to studs and the case next to it (case 2a).
Case 2 – Section 3: The upper horizontal unit with two larger cubbies
Built just as the other two cases, but with 1 center divider. This again was attached to studs, and to the adjoining cases.

The bench/nook area with hooks for coats and backpacks:
The bench is made of 2 pieces of ¾” plywood glued together, and a piece of ¾” thick by 1” wide maple for the face frame. This face frame covers the seam of the two joined plywood pieces.
Note: This piece was not installed until the end, after all painting was done. We also stained this piece before attaching to the rest of the system.
We used 1/2″ x 2″ strips for the board and batten. Then we placed a cleat under the bottom of the bench would go, to act as support along the back of the bench top. We made a center support by gluing and nailing two pieces of ¾” plywood and connected it to the wall and underside of the bench top by pocket hole screws.
Face frame:
As before, all face frame pieces were ¾” by 1 ½” poplar. Except at the very top and very bottom of cases where the frames are different sizes. All were attached using finish nails and wood glue. We wrapped the bottom of the units, including the walls with baseboard, where it fit. Then we installed ¼ round molding, to give it all a cohesive, built-in look. The addition of face frame also adds to the depth of all the cubbies.


Finish:
To finish the mudroom-closet build we filled all pocket holes with plugs, caulked as needed, sanded (including between coats of paint) and painted. Then it was time to install coat rods. Finally, accessorize with some hangers that fit the space, baskets, and any other things to make the space more unique.


So, there you have it! Keep in mind that our measurements may not work in your space. That is why this mudroom-closet build breakdown is just a guide and not a plan. Make sure to do your research to see what will work in your space. A project like this would be a major way to add character to your home while making your everyday life more organized! Tell us what you think, would you consider this addition to your home? If you found our mudroom-closet build breakdown helpful, please share, comment below. Tell us what you have done to create a working drop zone in your home?